Choosing a loft ladder for a tiny house isn’t just about getting upstairs, it’s about maximizing every square inch without sacrificing safety or livability. The wrong ladder can waste floor space, create hazards, or make daily access a frustrating chore. The right one transforms vertical circulation into storage, furniture, or even architectural interest. Whether someone’s building from scratch, retrofitting an existing loft, or weighing DIY versus pre-fab options, understanding the trade-offs between footprint, cost, and usability is key to making a smart decision.
Table of Contents
ToggleKey Takeaways
- Tiny house loft ladder ideas must balance space efficiency with safety—a poorly chosen design can waste 10–15 square feet and create hazards that affect resale value and insurance eligibility.
- Loft ladder designs that double as storage, such as staircase ladders with built-in drawers or cable railing ships ladders, maximize functionality and prevent wasted floor space in compact homes.
- Alternating tread stairs cut the horizontal footprint nearly in half compared to standard stairs while remaining code-compliant and significantly safer than vertical ladders.
- Fold-down or retractable ladders free 100% of floor space when not in use, though they require careful planning for hand clearance during descent and work best for seasonal or non-primary lofts.
- Essential safety features—including handrails on every ladder type, non-slip tread surfaces, adequate lighting, proper loft guardrails, and load testing before use—are critical in tiny houses where escape routes and clearances are already constrained.
- DIY-friendly options like simple ship ladders using 2×4 rails and hardwood dowels cost under $75 in materials, while reclaimed wood and cable railing systems add character and maintain open sightlines in small spaces.
Why Your Loft Ladder Choice Matters in a Tiny House
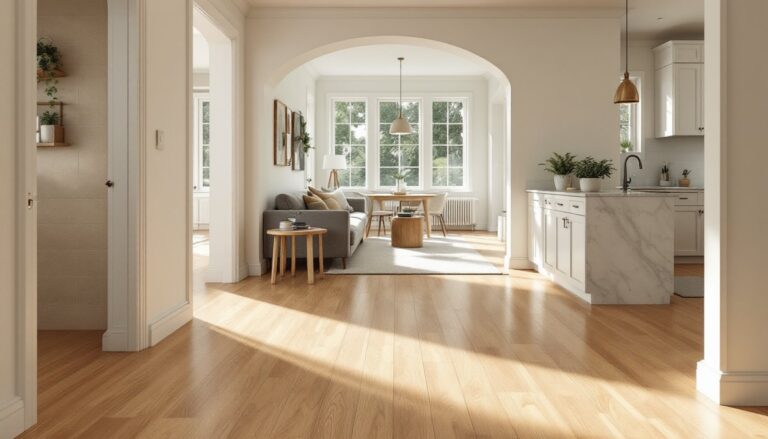
In a home under 400 square feet, every design decision compounds. A poorly chosen ladder can claim 10–15 square feet of floor space, interrupt sightlines, or create a bottleneck in daily movement patterns. It also affects resale value and insurance eligibility, some tiny house lenders and insurers require code-compliant stairs rather than ship ladders.
Safety is the primary concern. A vertical ship ladder works fine when someone’s 25 and healthy, but it becomes a liability with kids, aging joints, or midnight trips to the bathroom. Falls from loft ladders are the leading cause of tiny house injuries, according to anecdotal reports from tiny house communities.
Footprint comes next. A standard straight-run stair requires about 9–10 feet of linear space. Alternating tread stairs cut that to 5–6 feet. A vertical ladder uses 2 feet. The trade-off is always between space efficiency and ease of use.
Dual functionality makes or breaks the design. If a ladder only serves as a ladder, it’s wasted potential. The best solutions integrate storage, seating, or visual separation between zones. This is where creative problem-solving separates a cramped space from a clever one.
Space-Saving Ladder Designs That Double as Storage
Staircase Ladders with Built-In Drawers
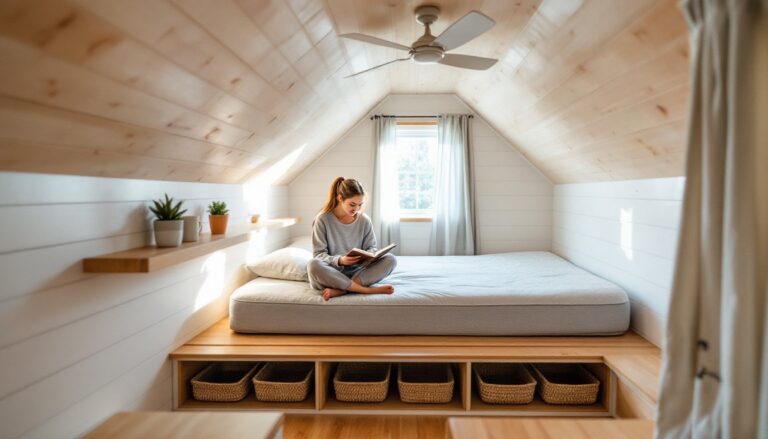
Staircase cubbies are the gold standard for tiny house loft access. Each tread sits atop a drawer or cabinet that pulls out horizontally. A typical unit with six risers at 7.5 inches each yields 45 inches of rise, enough for most lofts, and provides 12–18 cubic feet of storage.
Construction requires 3/4-inch plywood for the carcass, drawer slides rated for 100 lbs, and blocking secured to wall studs every 16 inches. Treads should be at least 10 inches deep to provide secure footing. The entire unit anchors to the wall framing, not just drywall, to handle live loads.
Drawers work best for clothing, linens, or pantry items. Avoid storing heavy tools or canned goods in upper drawers, it makes the stairs top-heavy and harder to climb. Some builders install open cubbies in lower steps for shoes or baskets, reserving drawers for upper steps where the weight doesn’t interfere with balance.
One downside: drawer pulls can catch clothing or bare feet. Recessed pulls or touch-latch hardware eliminates this hazard. Expect to spend $300–600 in materials for a DIY build, depending on hardwood versus plywood finishes.
Alternating Tread Stairs for Compact Footprints
Alternating tread stairs (also called paddle stairs or Jefferson stairs) feature offset treads that alternate left-right, allowing a steeper pitch, typically 56° versus 35° for standard stairs, while maintaining a safe step depth. This design cuts the horizontal run nearly in half.
Each tread is roughly 8 inches deep on the stepping side and notched out on the opposite side. The user naturally alternates feet, which feels awkward for the first few climbs but becomes intuitive. They’re significantly safer than vertical ladders and meet IRC code in many jurisdictions when used for lofts.
Materials include 2×10 or 2×12 stringers, 1×10 treads, and lag bolts or structural screws for connections. The top and bottom must anchor to solid framing, this isn’t a project for drywall anchors. Plans are widely available from woodworking sites like Fix This Build That, which offers detailed cut lists and jig templates.
Some homeowners implementing house hacking ideas in garage conversions or ADUs find alternating tread stairs the only way to meet ceiling height and footprint restrictions while staying code-compliant. One caution: they’re difficult to navigate while carrying objects. If someone regularly hauls laundry or boxes to the loft, a wider design or handrail on both sides is worth the trade-off.
Retractable and Fold-Down Ladder Options
Attic-style fold-down ladders adapt well to tiny houses when floor space is at an absolute premium. They hinge at the loft floor and fold up flush when not in use, freeing 100% of the footprint. Commercial units like the Louisville Ladder Elite Aluminum model hold 250–375 lbs and install in a few hours.
Key measurements: the ceiling height dictates ladder length. For an 8-foot loft, choose a ladder rated for 7’8″ to 10′. Rough opening dimensions range from 22×54 inches to 25×64 inches, verify framing before ordering. Installation requires cutting through the loft floor and adding headers if the opening doesn’t align with existing joists.
Operation is straightforward: pull a cord or handle, unfold the ladder, and lock the legs. When finished, reverse the process. The ladder stores inside the loft, which works only if there’s clearance and the loft isn’t a dedicated sleeping platform.
Ship ladders with hinges are the DIY alternative. Build a fixed-rung ladder from 2×4 rails and 1-inch dowels or metal rungs spaced 12 inches apart, then mount it on heavy-duty strap hinges at the base. A rope or chain at the top controls deployment angle. When not in use, it folds flat against the wall or rotates out of the way.
This design is more affordable ($50–150 in materials) but less polished. It’s ideal for workshops, studios, or seasonal lofts, not primary sleeping areas. Always install a locking mechanism, a carabiner, gate hook, or pin, so the ladder can’t swing freely and become a head hazard.
One often-overlooked detail: fold-down ladders require hand clearance when descending. Users climb down facing the ladder, which means hands and feet share the same vertical plane. If the loft opening is surrounded by cabinetry or low beams, it’s easy to bang knuckles or hit your head.
DIY-Friendly Loft Ladder Projects for Budget-Conscious Builders
Simple ship ladders remain the most accessible DIY option. Two 2×4 or 2×6 rails spaced 16–18 inches apart, with 1-inch hardwood dowels or 3/4-inch black pipe as rungs every 10–12 inches. Total material cost: under $75. Secure the top with lag bolts into rim joists and anchor the base to the floor with angle brackets.
Rung spacing matters. Twelve inches is the maximum comfortable reach for most adults: 10 inches is better for kids or shorter users. Anything less than 8 inches feels cramped and wastes material. Drill pilot holes before driving dowels or pipe to prevent splitting.
For a more refined look, rout or chamfer the rails and apply a durable finish like polyurethane or tung oil. Skip paint, it chips under foot traffic and becomes slippery when worn.
Reclaimed wood ladders add character and save money. Old barn beams, salvaged decking, or pallet lumber work well if they’re free of rot, cracks, or metal fasteners. Inspect each piece carefully. Surface imperfections are fine: structural weaknesses aren’t. Plane or sand rough surfaces to prevent splinters.
Joinery can be as simple as pocket screws or as refined as mortise-and-tenon. For a first-time builder, construction adhesive plus 3-inch screws through the rails into each rung provides plenty of strength. Clamp everything square before fastening.
Cable railing ship ladders have gained popularity for modern tiny house aesthetics. Replace solid sides with steel cable or 1/4-inch stainless steel rod tensioned between top and bottom rails. This maintains an open sightline, making small spaces feel larger. Hardware kits run $100–200 and include tensioners, end fittings, and mounting posts.
One project that beginners often tackle successfully is a ladder made from 2×6 treads sandwiched between 2×3 stringers, creating a narrow staircase with open risers. Plans from sites like The Handyman’s Daughter walk through cut angles, assembly order, and finish options. It’s more forgiving than traditional stair stringer layout but still provides stable footing.
Safety Features Every Tiny House Ladder Needs
Handrails are non-negotiable. Even on vertical ladders, users need something to grip. IRC code requires handrails on stairs with four or more risers, but in tiny houses, install them on every ladder type. Mount rails 34–38 inches above the tread nose and ensure they’re graspable, 1.25 to 2 inches in diameter.
For ship ladders, a single rail on one or both sides provides stability. For alternating tread stairs, continuous rails on both sides are essential because users shift weight side-to-side. Secure rail brackets into studs or blocking, not just drywall. Each bracket should handle a 200-lb lateral load.
Non-slip tread surfaces prevent the majority of falls. Options include:
- Adhesive grip tape (easy, affordable, replaceable)
- Routed grooves or dado cuts across treads
- Rubber stair tread covers
- Textured paint with added silica sand
Avoid relying solely on finish texture, bare wood becomes slick with wear or moisture.
Adequate lighting is often forgotten until someone climbs down at 3 a.m. Install LED step lights along one or both stringers, or use motion-activated puck lights at the base and top. Low-voltage DC systems (12V) are safer than AC and easier to DIY. Aim for at least 10 lumens per step.
Loft guardrails matter as much as the ladder itself. The loft edge requires a railing at least 36 inches high with balusters spaced no more than 4 inches apart to prevent children from slipping through. This applies even if the loft is only used for storage, access equals occupancy in most codes.
PPE during construction: Always wear safety glasses when cutting, hearing protection when using power saws, and a dust mask when sanding. Loft ladder projects involve overhead work, so a hard hat isn’t overkill if working alone.
Finally, load testing before putting a ladder into service is critical. Apply at least 300 lbs of static weight (sandbags, concrete blocks) to the center of each tread for several minutes. Inspect all connections for movement, cracking sounds, or fastener withdrawal. If anything shifts, reinforce before use. A failed ladder during construction is inconvenient: a failed ladder at 2 a.m. is dangerous.
Anyone designing loft access should review alternating tread stair plans to see how professionals balance code compliance with compact design. These details, handrail placement, tread depth, riser height, aren’t arbitrary. They’re based on decades of injury data and biomechanics research. Cutting corners on safety to save six inches of floor space is a poor trade in any dwelling, but especially in a tiny house where escape routes and clearances are already tight.