A covered patio attached to the house delivers immediate shade, shelter from unexpected rain, and a seamless transition between indoor and outdoor living. Unlike freestanding structures, an attached patio taps into your home’s existing footprint, often simplifying permitting and reducing construction time. Whether you’re after a sleek modern extension or a cozy bungalow-style retreat, the right combination of roof design, materials, and detailing can turn a bare slab or deck into a year-round gathering spot. This guide walks through roof styles, material choices, must-have features, and the decision points between DIY and professional builds so homeowners can plan a patio that fits both their skill level and budget.
Table of Contents
ToggleKey Takeaways
- A covered patio attached to your house simplifies permitting, reduces construction costs, and creates a seamless transition between indoor and outdoor living spaces.
- Choose a roof style—gable, pergola, or louvered—based on your climate, desired headroom, and architectural style; gable roofs offer superior drainage while louvered systems provide adjustable weather protection.
- Match your covered patio’s materials, trim, and finishes to your home’s existing architecture to ensure it reads as intentional design rather than an afterthought and boost resale value.
- Enhanced features like ceiling fans, recessed lighting, and retractable screens transform a basic shelter into a functional outdoor room that extends usability across seasons.
- A simple shed-roof patio is achievable for confident DIYers with basic tools ($1,200–$1,800 in materials), but professional installation is worthwhile for complex structural work, electrical/gas lines, or automated roof systems.
- Always verify local building code requirements early, obtain necessary permits ($150–$600), and schedule inspections after footing, framing, and roofing completion to avoid costly delays.
Why Attach a Covered Patio to Your House?
Attaching a patio cover to the home’s exterior wall offers structural and logistical advantages over a detached pavilion. The ledger board, the horizontal beam bolted to the house’s rim joist or band board, carries half the roof load, cutting material costs and simplifying the foundation plan. Fewer posts mean more usable floor space and cleaner sight lines into the yard.
From a code standpoint, many jurisdictions classify an attached patio cover as an accessory structure, which may allow simpler permitting than a standalone building. Check with your local building department early: requirements vary widely for setbacks, frost-depth footings, and fire-rated assemblies if the patio sits near a property line.
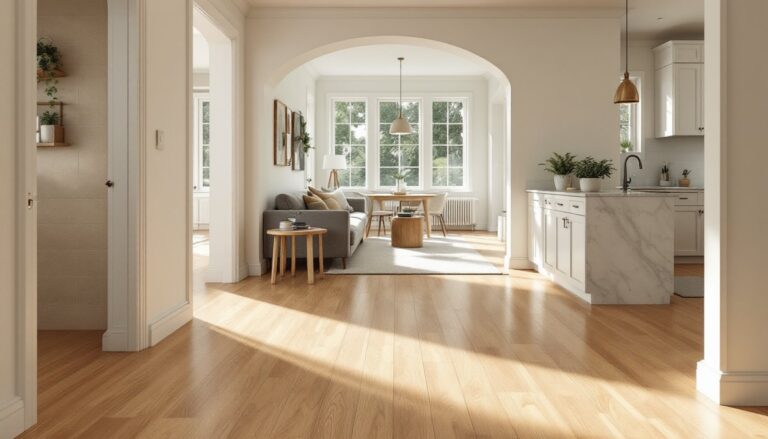
Practically, an attached design shortens the walk from kitchen to grill and keeps rain off the door threshold. When designed to match the house’s roofline and trim, it reads as original construction rather than an afterthought. Resale value climbs when outdoor living space feels integrated, buyers pay a premium for well-executed transitions that extend square footage without adding conditioned interior area.
Popular Roof Styles for Attached Covered Patios
Roof geometry defines the patio’s character and dictates how water drains, how much headroom you’ll have, and which materials make structural sense.
Gable Roof Designs
A gable roof runs perpendicular to the house wall, creating a peaked profile that sheds rain and snow efficiently. The ridge beam typically ties into the house just below the eave or at a mid-wall height, depending on ceiling clearance goals. Gable framing requires a ridge board, common rafters, and a ledger, making it more complex than a simple shed roof but delivering better ventilation and a classic silhouette.
When choosing pitch, match the house roof if possible, most residential roofs sit between 4/12 and 6/12. A steeper pitch improves drainage in wet climates and offers space for recessed lighting or ceiling fans between rafters. Gable ends often feature decorative brackets, lap siding, or board-and-batten to echo the home’s façade. Budget $18–$28 per square foot for framing and sheathing labor in most markets, excluding roofing material.
Pergola and Louvered Roof Options
Pergolas trade full weather protection for dappled light and airiness. Open rafters spaced 12 to 24 inches on center allow sun and breeze through while defining the overhead plane. Attached pergolas use a ledger at the house and freestanding posts at the outer edge, often anchored to concrete footings with galvanized post bases.
For adjustable coverage, louvered roof systems rotate aluminum or composite slats from fully open to fully closed. Motor-driven versions integrate with smart-home platforms and rain sensors. Expect installed costs around $40–$60 per square foot for quality louvered kits: DIY installation is possible if you’re comfortable with electrical runs for motorized units. Louvered systems shine in climates with variable weather, letting homeowners dial in sun exposure or seal out afternoon showers without fixed panels.
Material Choices That Match Your Home’s Architecture
Cohesion between house and patio materials prevents the addition from looking tacked-on. Start with the existing roof: if the house wears asphalt shingles, carrying the same profile and color onto the patio roof creates visual continuity. Metal roofing, standing seam or corrugated panels, suits modern farmhouse and industrial styles and installs faster than shingles, though expansion-contraction noise can be noticeable during temperature swings.
For posts and beams, pressure-treated southern yellow pine offers economy and wide availability in standard dimensions (actual 5.5″ × 5.5″ for nominal 6×6 posts). Cedar and redwood resist rot naturally and take stain beautifully, but cost roughly double. Engineered lumber such as glulam beams spans longer distances without sagging, ideal for patios wider than 16 feet where solid-sawn lumber would require mid-span support.
Fascia, trim, and post wraps should mirror the house’s trim package. If the home has 1×6 fiber-cement fascia and crown molding, replicate those profiles on the patio. PVC trim boards simplify maintenance, they won’t rot and hold paint indefinitely, but they expand and contract more than wood, so follow manufacturer fastening schedules to avoid buckling. Homeowners seeking inspiration for classic outdoor design will find detailed breakdowns of trim joinery and material selection that translate well to patio projects.
Design Features to Enhance Comfort and Style
Once the bones are framed, thoughtful details separate a basic shelter from an outdoor room.
Ceiling fans with wet or damp UL ratings improve air movement on still summer evenings. Mount them to a fan-rated junction box screwed to blocking between rafters, not directly to rafter faces. Downrod length matters, blades should sit 8 to 9 feet above the finished floor for optimal airflow without decapitating tall guests.
Recessed lighting requires planning during framing. IC-rated (insulation-contact) cans work in insulated roof assemblies: non-IC cans need clearance from insulation. LED retrofit kits drop energy use and maintenance. For ambiance, consider low-voltage strip lighting along beams or under cap rails, controlled by dimmers.
Integrating retractable screens or clear vinyl curtains extends the season. Track-mounted screens roll down to block insects or midday glare without permanent walls. In regions with wind-driven rain, removable panels let the patio function as a three-season room. Garden enthusiasts often tie patio design to the surrounding landscape and planting zones, using built-in planters, trellises, or vertical gardens to soften hard edges and introduce seasonal color.
Outdoor kitchens and fireplace cores anchor the space functionally. A simple grill island with concrete-board sheathing and stacked stone veneer can be assembled over a weekend with mortar and a level. Gas lines and electrical circuits for refrigerators or warming drawers require permits and inspections in most jurisdictions, hire licensed trades if you’re not confident pulling permits yourself.
Budget-Friendly DIY vs. Professional Installation
A straightforward shed-roof patio cover, 10×12 feet with pressure-treated posts, 2×6 rafters at 24″ on center, and asphalt shingles, falls within reach of confident DIYers. You’ll need a circular saw or miter saw for cuts, a drill for lag screws into the ledger, a post-hole digger or auger for footings, and a level (a laser level speeds layout). Framing square and speed square ensure rafter birds-mouths and plumb cuts. Budget $1,200–$1,800 for materials if you already own the tools.
Permit costs range from $150 to $600 depending on jurisdiction and project valuation. Inspections typically occur after footing pour, framing completion, and final roofing. Missing an inspection can delay the project and incur re-inspection fees, so coordinate schedules with your building department early.
When professional help makes sense:
- Structural attachment to two-story homes or homes with complex roof intersections. Flashing details and load-path calculations require engineering.
- Sites with poor drainage or expansive soils. Footings may need to reach deeper than the IRC’s standard 12-inch below frost line, and a soils report can prevent costly settling.
- Electrical or gas rough-ins. Licensed electricians and plumbers carry liability insurance and pull their own permits.
- Louvered or automated roof systems. Warranty coverage often hinges on certified installer work.
Contractor bids for a full build typically land between $25 and $65 per square foot, with wide variation based on finishes, roof complexity, and regional labor rates. Get at least three itemized quotes and verify each contractor holds a valid license and general liability coverage. Readers interested in regional design traditions, particularly in the South, will find that porch and patio layouts often prioritize deep overhangs and ceiling fans, details that influence both material quantities and structural loads.
Safety reminders: Wear safety glasses when cutting lumber and driving fasteners. Use fall protection, harness and anchor, if working more than six feet above grade. Ear protection matters during extended saw work. Concrete mixers and augers demand gloves with good grip. Never work alone on overhead framing: a second pair of hands steadies beams and catches mistakes before they become injuries.